In this series I will begin to show you how to lock-down an iPhone/iPad so that your child can communicate and you can feel confident that they will be secure.
Let's start with the basics. If you haven't already, you will need to register your child with their own Apple ID. Hopefully, you have your own iPhone or iPad to start this process, as, to be perfectly frank, I have no idea if you can do it otherwise and I'm not sure if the rest of these tutorials will be valid.
Why would I setup my child with their own account and not just use my own? There are many features that can be leveraged to lock down your child's account, but if you apply it to your own, you would lose access to features on your phone until you unlock them or change the settings to remove the lockdown from your device. Your child can have his/her own contacts, FaceTime won't be ringing on your phone whenever a friend is trying to get ahold of your child. Quite honestly, you could setup a different device with the specific settings against your own account, but being able to apply the rules to all of your child's (account) makes it all that much easier.
For those that have not been through the process of establishing an Apple ID for a minor, let's start there.
1. Go to the Settings Menu on your iPhone or iPad...
2. Go into your "Apple ID" menu...
3.Click on "Family Sharing"...
4. Click on "Add Child"...
5. In "Create a Child Account", click "Continue"
6. Now, this may surprise you, but to verify you are an adult, they require that your credit card be verified. If you don't have a credit card on file, this screen may be different. This is a requirement across all major technology companies to verify age when establishing accounts for minors.
7. The Disclosure page will require that you agree to Apple's Privacy Disclosure in order to continue. If you are uncomfortable agreeing to this, you should stop the process here and, perhaps, rethink providing a device to your child at all, as this is somewhat similar to the same information included in the standard Apple disclosures, but some laws require that certain privacy rights be applied to minors. Needless to say, if you don't click "Agree", you can stop reading this.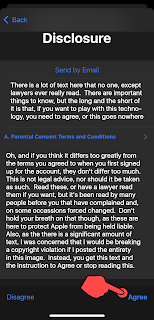
8. You now need to name your child, hopefully that event occurred closer to the actual birth of your child. I think the Apple terms may strictly forbid it, but I like to guess as to the maturity of my child and select a better birthday for him/her.
9. You will need to provide an email for your child that is unique from your account If you do not have an email, click "Don't have an email address?". An email may be requested from Apple using their iCloud service (@icloud.com) by clicking "Get an iCloud Email Address". This is a very common approach for minors to get setup in the Apple-verse.
10. Now select an awesome email name for your child, and remember that this could potentially be used for years to come as an actual email address, so please avoid smootchkins@icloud.com or mommaslittlecutie@icloud.com. Remember your first job application listed that email of ilovekeggers1998@aol.com ? Yes, I know it was, and you were embarrassed, so please don't do that with your child's email... Although, on second thought, they would likely never give it to anyone, greatly reducing the spam they get, especially from relatives.
11. You need to verify and click "Create Email Address" or it won't work.
12. Now, select the password for your child... and if you are thinking Password123 is good, we can't be friends anymore.
Pick something strong and pick something unique. If you don't have a password manager, you can use Chrome, in a later blog we may get more into iCloud, but if not, you can always go there when done with this tutorial, log into your child's account and save the login and password information into Chrome.
Now, your first real semblance of control is to not provide your child this password. By not providing the password, they can't attempt to enter it in phishing emails or messages, they can't tell it to strangers, and they can't inadvertently buy things from Apple.
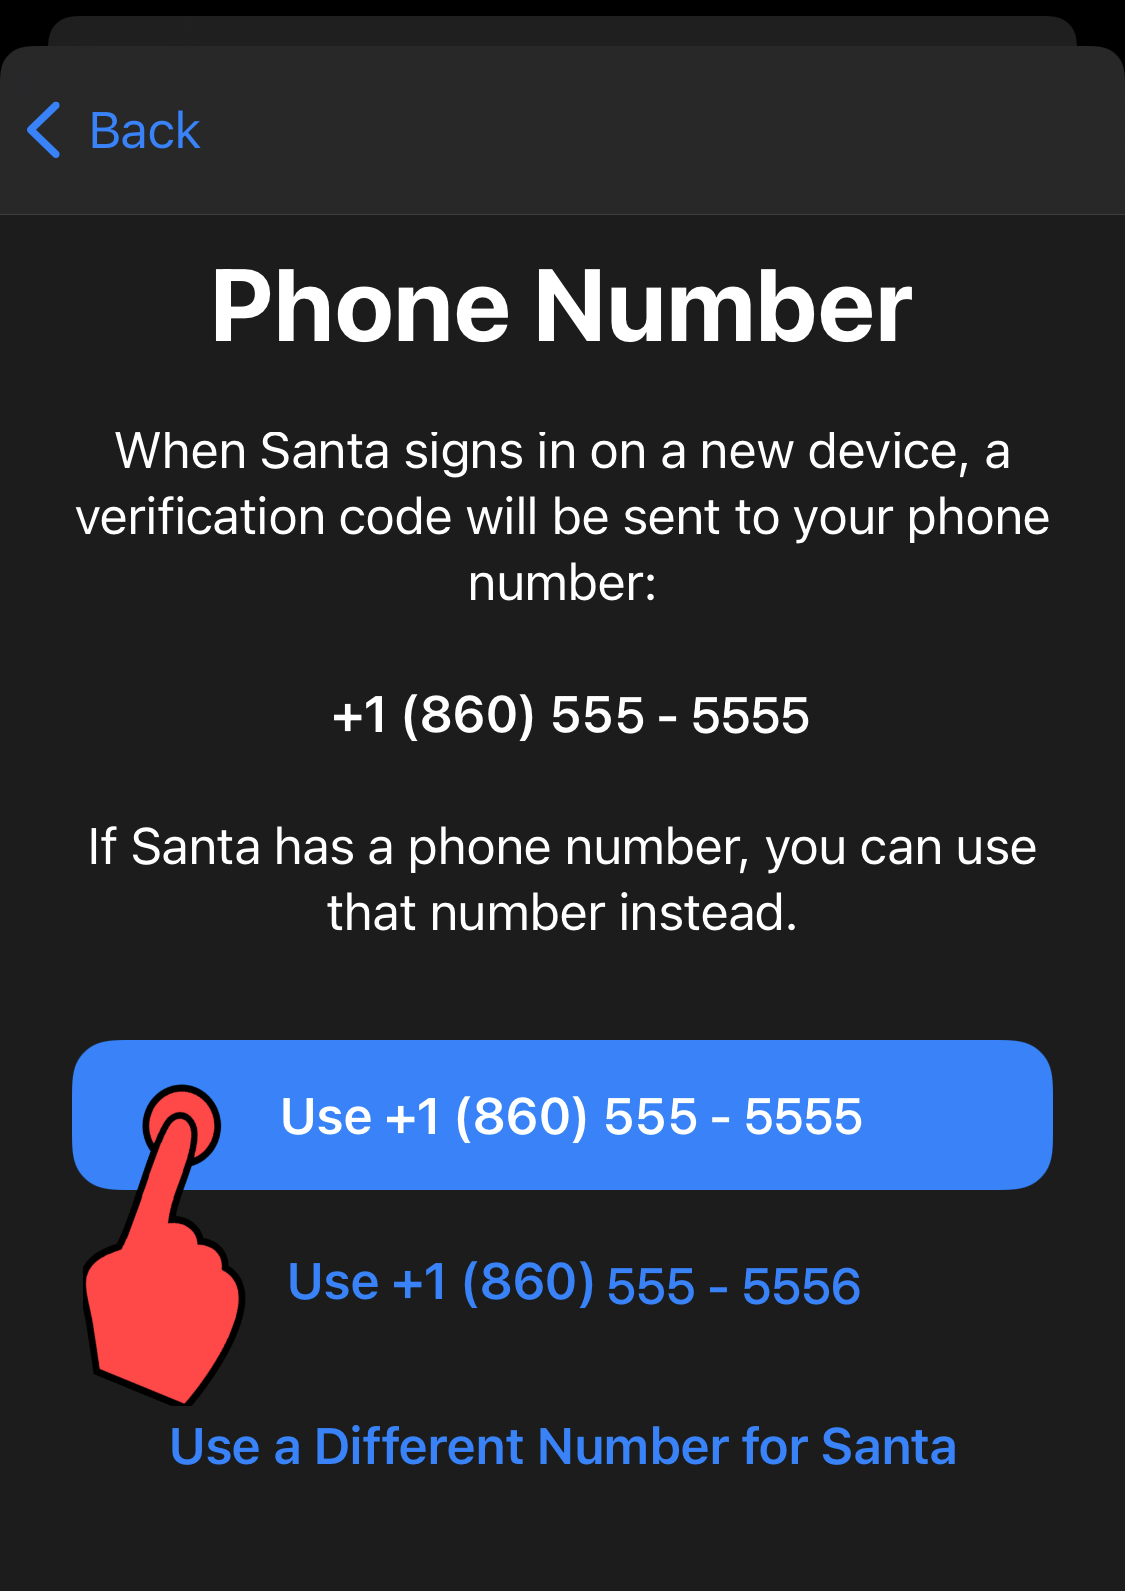
13. Here is your second semblance of control, assuming you made the mistake of telling your child the password, at least they can't use any random device they find. The verification code prompts when the account is being setup on a new device or logging into iClould from a new browser. The verification message usually has a general geographic position, an "Allow" or "Not Allow" and upon selecting, a prompt with a 6 digit one-time passcode that needs to be entered. It's generally considered by security practice as a generally secure authentication methodology.
14. Now you must agree to the Terms and Conditions. I am not a lawyer and I am not providing legal advice. Do whatever option you want here, but the only way Apple allows you to proceed with the rest of these instructions is to agree to their terms.
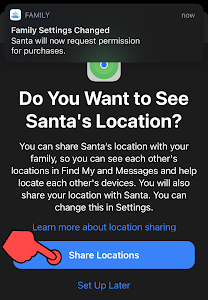
15. Now you are given the option to enable two features, "Ask to Buy" and "Locating Sharing". These are very critical to enable.
"Ask to Buy" pertains to any event where the minor is being asked to either procure something for money or to install a new App from the App Store. It is strongly recommended to "Turn on Ask to Buy:"
"Location Sharing" allows you to locate the minor's device as long as it has Internet connectivity (cellular or WiFi) and the battery is not completely drained or turned off.
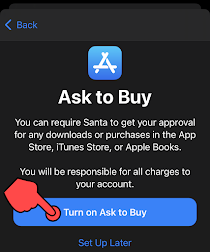
Note: When you enable the "Ask to Buy" a message appears showing the reflected change. This is the same style of notification that will occur every time your child "Ask[s] to Buy" something.
16. Once you are done with that step, you will finally see the new account listed under your "Family" settings page.
You can now proceed to Step 2 - Enabling "Screen Time"


No comments:
Post a Comment